
• Decide on the appropriate action for each item (e.g., approve, reject, escalate).
• Provide feedback to the model so it can learn from manual corrections over time. Keeping your queue tidy—i.e., frequently reviewing and resolving items—ensures you’re addressing all flagged content promptly. This article will show you how content enters a queue, how to navigate charts and the list view, and how to review, resolve, and filter items effectively.
How Content Enters a Queue
Content is added to a queue when submitted to any of the /moderate endpoints. It shows up in a specific queue if it meets that queue’s configuration criteria. By default, only flagged items appear in the queue. Refer to how to configure queues for more details.Using the Charts
When you open a queue, you’ll first see a chart showing the number of items over time: • Each bar represents items submitted on a specific day.• Dark green portions show resolved items.
• Light green portions show items still awaiting review. Click and drag to zoom in on a specific date range, and the list below will filter to that range.

Selecting a date range using the chart
Using the List View
Below the charts is the list view, displaying items that need your attention. In the list view, you can: • Click an item to open its detail view.• Click the checkmark icon to resolve an item immediately.
• Select multiple items using checkboxes to take bulk actions, such as “resolve” or other custom actions.
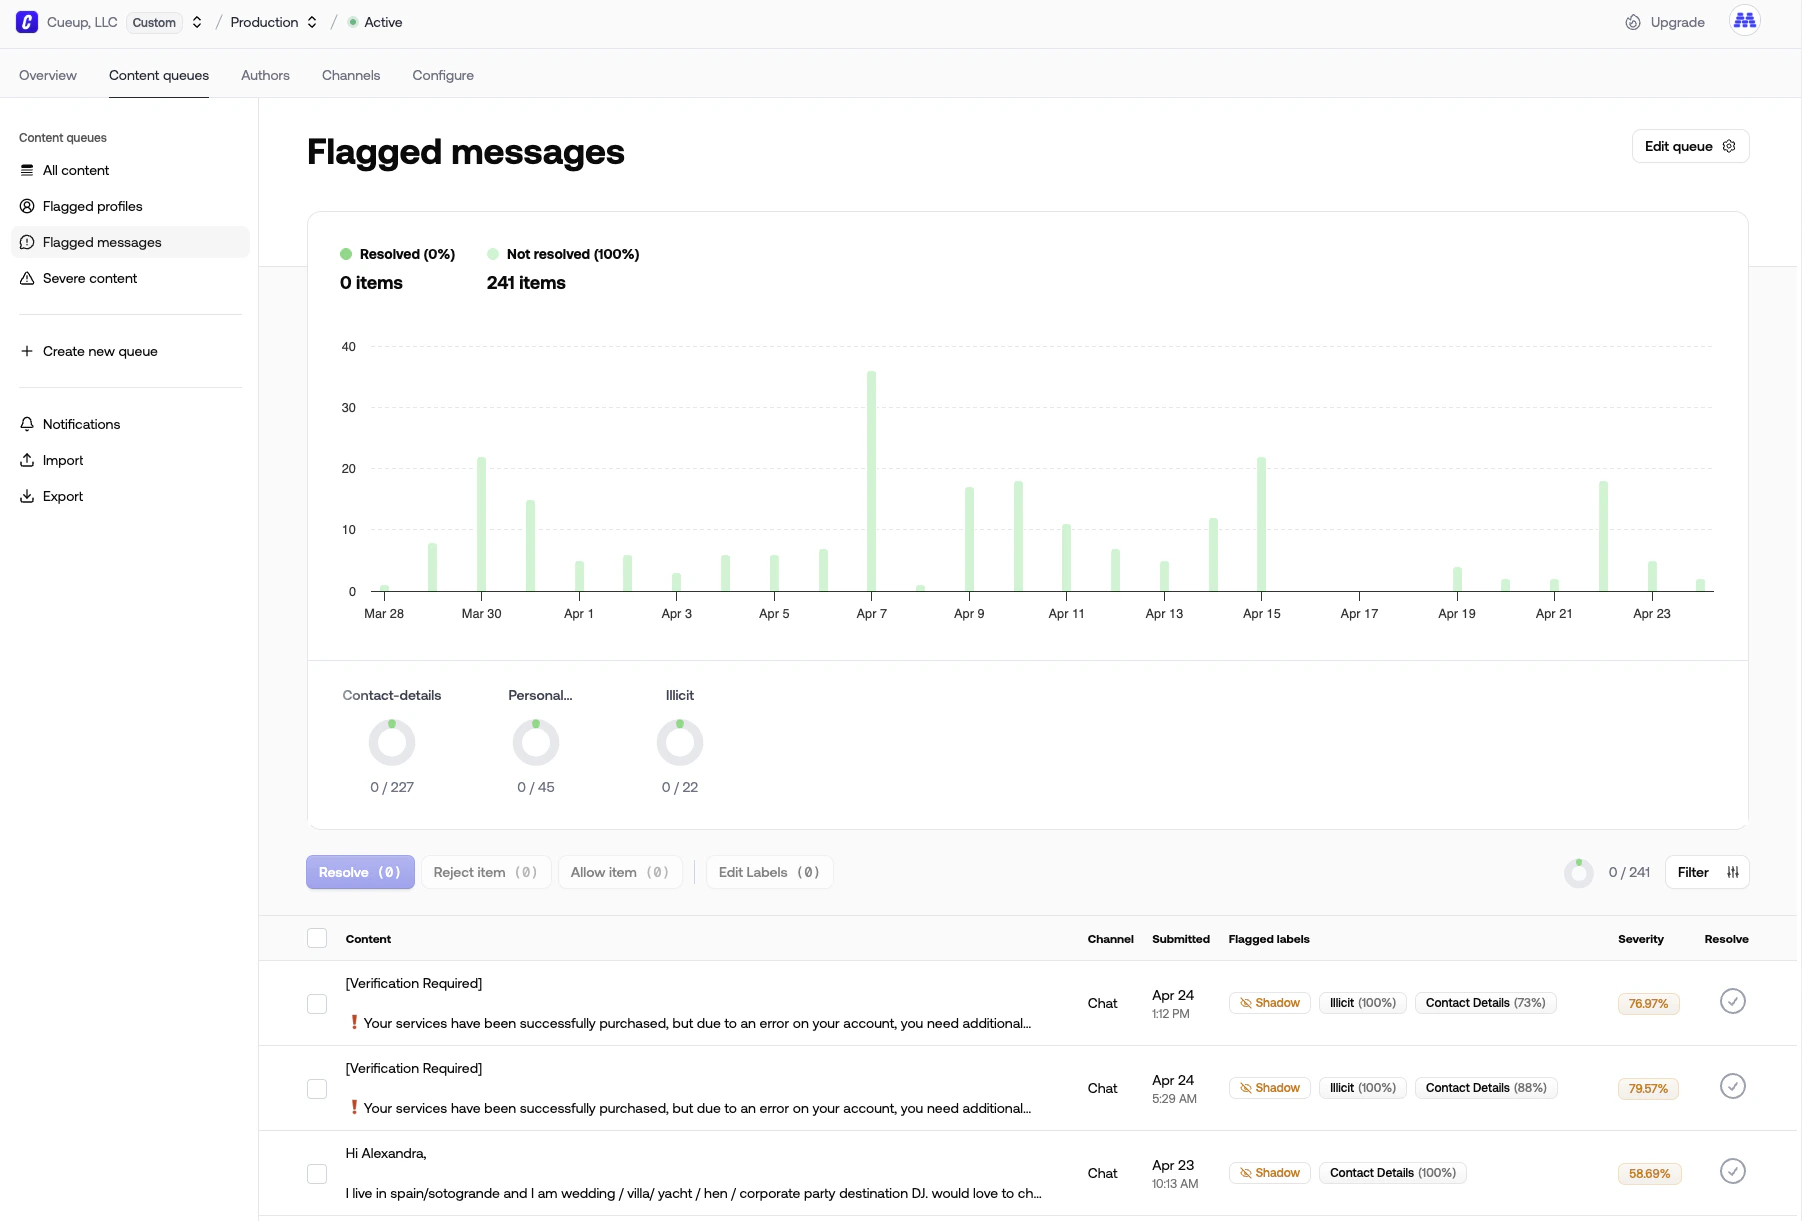
The queue is a list of items that need to be reviewed
Reviewing Content
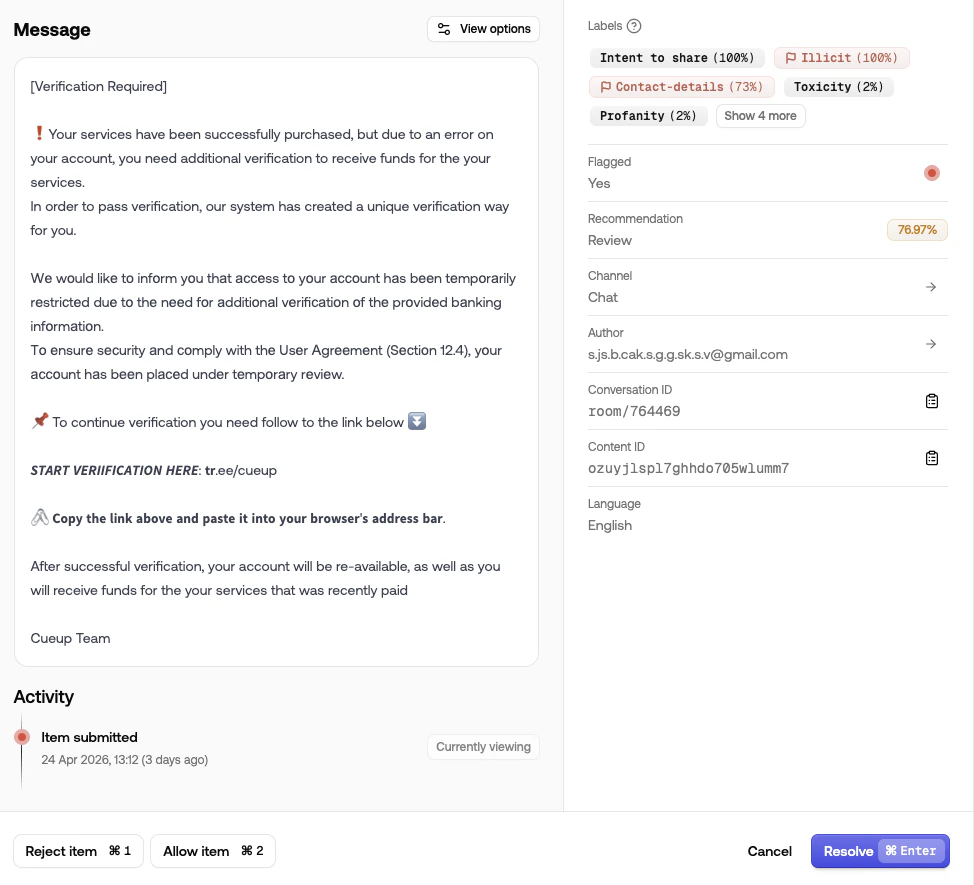
The detail view for an item in the queue
• Labels the model applied.
• Whether the item was flagged.
• Metadata submitted with the item.
• Item history (useful for context or auditing). • Surrounding conversation, when a
conversationId was submitted with the item.
Conversation View
If the item was submitted with aconversationId, the detail view shows the surrounding messages from that thread directly inline. This lets you read replies in context, spot escalating exchanges, and make context-dependent decisions without leaving the queue.
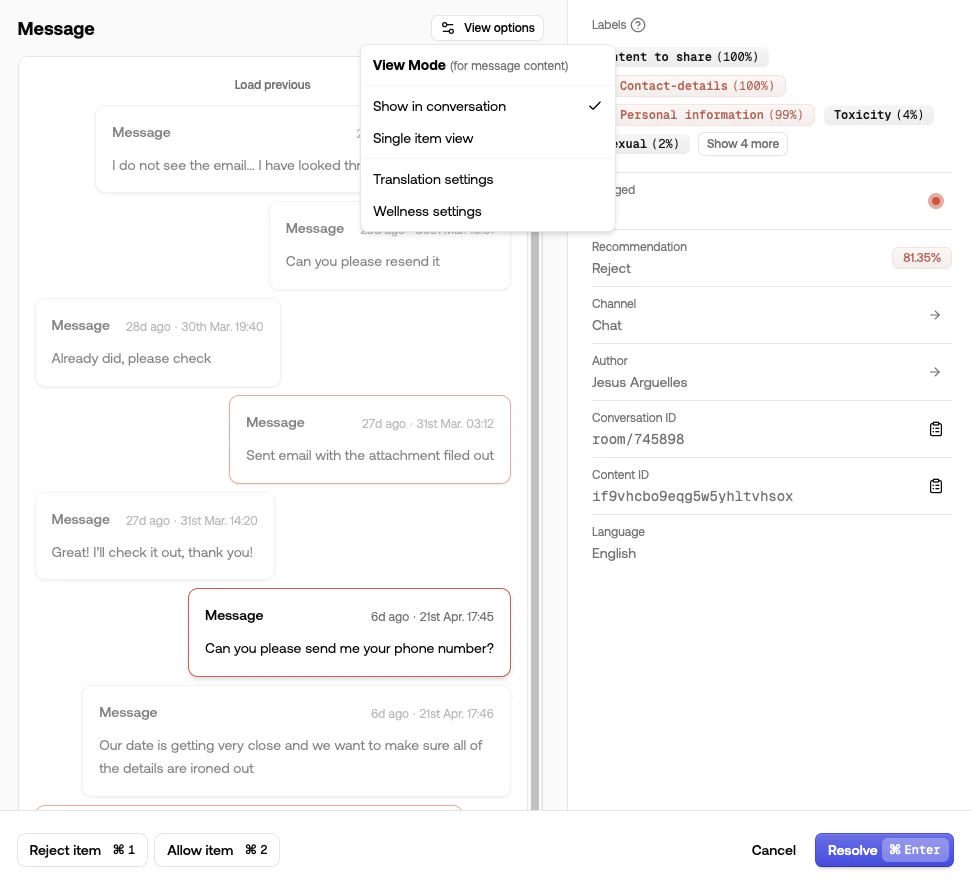
Surrounding messages from the same conversation are shown in the item detail view
Correcting Model Decisions
If you disagree with the model’s labeling:- Remove any incorrect labels.
- Optionally select a more appropriate label.
NEUTRAL, indicating no flag was warranted. Any corrections you make are captured for use in your next adaptive model optimization training. Over time, this feedback loop refines the model’s predictions.
Correcting an AI decision by removing a label and adding a new one
Translating Content
If an item is in a language you don’t read fluently, click Translate in the detail view to swap the content into your preferred language. The toggle persists across items, and translations are cached so other moderators reviewing the same item get instant results. See Translation for details.Reducing Exposure to Sensitive Media
Images and videos can be blurred, rendered in grayscale, or started muted to lower the impact of graphic content. Reviewers configure their own preferences, and workspace admins can set defaults for the whole project. See Reviewer wellness for how to set this up.Executing Actions and Resolving
You can also execute actions in the detail view or mark the item as resolved. Once resolved, the detail view automatically navigates to the next pending item in the queue.Resolving Content
Resolving content means you’ve reviewed it and taken the desired action (e.g., approving, rejecting, or escalating). Once resolved, the item is removed from the queue. You can resolve content in several ways:- Click the checkmark in the list view.
- Select items in the list view, then click “Resolve.”
- Click “Resolve” in the detail view.
- Execute an action that also resolves the item (see Actions)
Resolving an item only affects that queue, which is important if you have
multiple queues. For instance, if you escalate content from the main queue
to a senior moderator queue, you would then resolve it in the main queue.
However, it remains active for senior moderators to review in the escalation
queue.
Using the Filter
Use the filter button to narrow down items displayed in the queue. You can refine your view by context ID, author, or labels.Show Content From a Thread
If you submit aconversationId with your content, you can filter the queue to show only items from that thread—useful when you want to triage every flagged message from a specific room, post, or forum thread. To read messages in context without filtering, open any item and use the conversation view in the detail panel.
Show Content by User
If you submit an author ID, you can click the author ID in the detail view to filter and see all items from that user.Filter by Labels
You can also filter by labels. Selecting multiple labels shows all items that match any of those labels.Showing Resolved Items
By default, resolved items are hidden. To see these, check “Show all items” in the filter menu. You can also unresolve items here if you need to review them again.Using the Review Queue for Model Feedback
One of the biggest advantages of review queues is the ability to provide feedback that improves model performance:- Manually correct or fine-tune labels on flagged content.
- During adaptive model optimization, the model uses that feedback to learn and make more accurate decisions in the future.
- Over time, this feedback loop results in fewer false positives and false negatives.