1. Select your type of model
The first step is to select your type of model. In this guide we’re focused on creating a classifier so that’s what you want to pick.
2. Define your labels
Firstly, you should determine the specific categories or labels you intend to detect. It is advisable to add a limited number of labels as it enhances the performance of the model by reducing complexity. In case you encounter a complex situation, you may consider developing two models instead of a single model with several labels.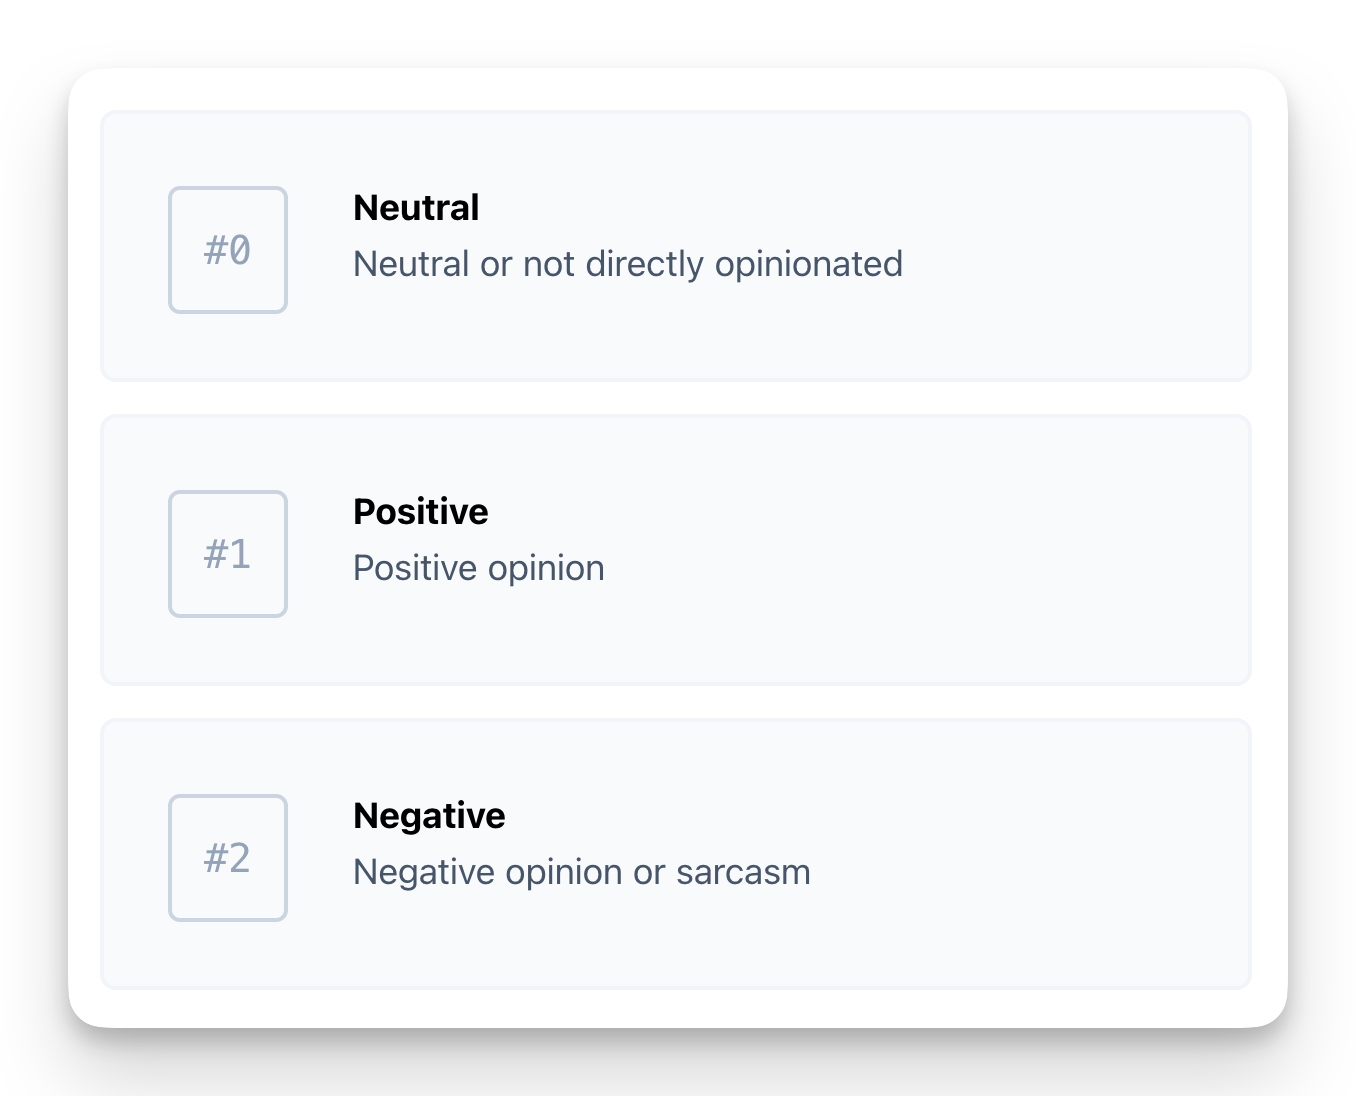
3. Add your training data
To train your model, let’s add some data by providing examples of previously seen text, and the corresponding label that needs to be assigned to them. With Moderation API, this process is made easy, and you get the infrastructure to avoid common pitfalls like duplicate or skewed data. We have a few guidelines for getting the best results:- 100 examples or more per. category, though you may get by with less for simple problems.
- Clean your data. Incorrect examples will result in poor performance.
- Diversify the examples to help the model generalise better.
- If the model produces an inaccurate prediction, try to add a few more examples for the given problem.
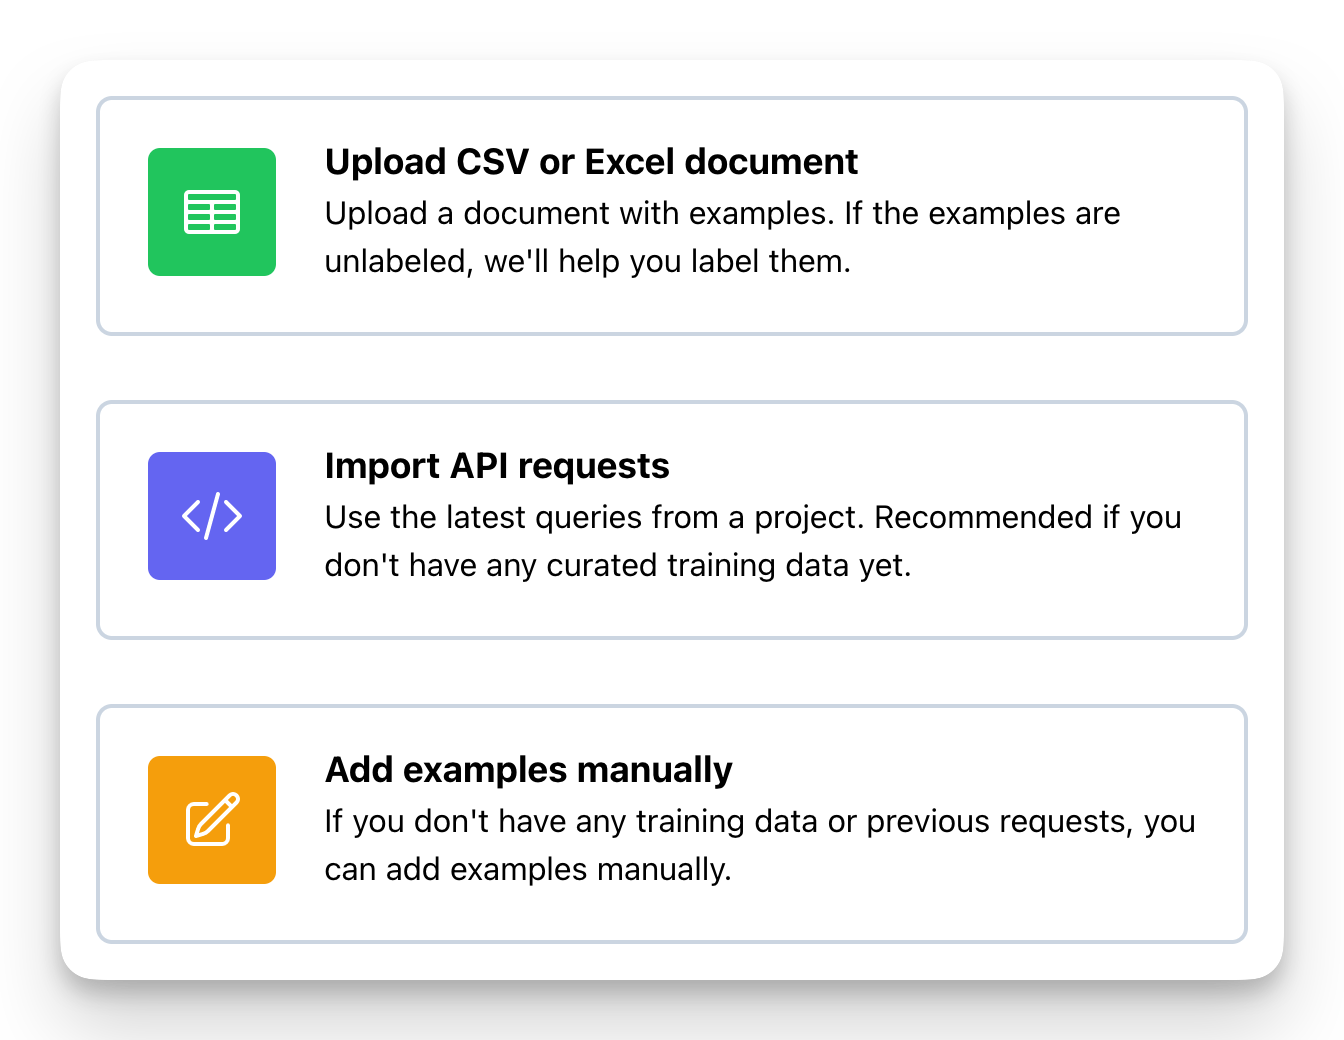
- Upload a CSV or excel document.
- Use previous requests stored in moderation API.
- Add or update examples manually.
Upload CSV of Excel document
To upload a large number of examples to your model, you can create a CSV or Excel document and upload it. For instance, you could extract a CSV file from the latest 5000 user posts on your website and upload it here. When uploading the file, you will be prompted to indicate which column contains the text example, and optionally, which column contains the label. If the data is already labeled, the label column should contain a number that corresponds to the label, not the actual label name. For example, if there are 3 labels, the label column should contain 0, 1, 2, or be empty if there is no label. If your data is not labeled yet, we will help you annotate it in the next step.Use previous requests stored in moderation API
If you’ve already been using moderation API for a while, and have enabled request logging, you have the option to import these requests for your model. This is the fastest way to add training data to your model. This is also an excellent way of continously add data and re-train your model to keep it up to date with the real world. For example, once per month you can add the latest requests from your project, and re-train and update your model with the new knowledge. You can choose to import from any of your projects or from all of your projects. For example if you have a project used for development and one for production, you can import from production only.Add or update examples manually
This option should only be used if you don’t have any training data, or very little training data. You can manually type a text and choose the correct label. This way it is possible to create a bunch of examples and get started with your model. In some simple cases with few training examples you might be able to create a decent model this way. The option can also be used to inspect and update existing examples that have been added using any of the other methods.4. Annotate your data
If your data has already been labeled prior to uploading, you can skip this step. If not, now is the time to annotate your examples with labels. Data labeling can be extremely time-consuming and often presents a significant challenge for businesses in creating custom machine learning models. With our user-friendly annotation tools, this process becomes significantly easier. You have two options for annotating your data:- Automated annoation
- Manual annotation
Automated Annotation
This feature uses an LLM to annotate your examples based on the labels and descriptions you’ve previously provided.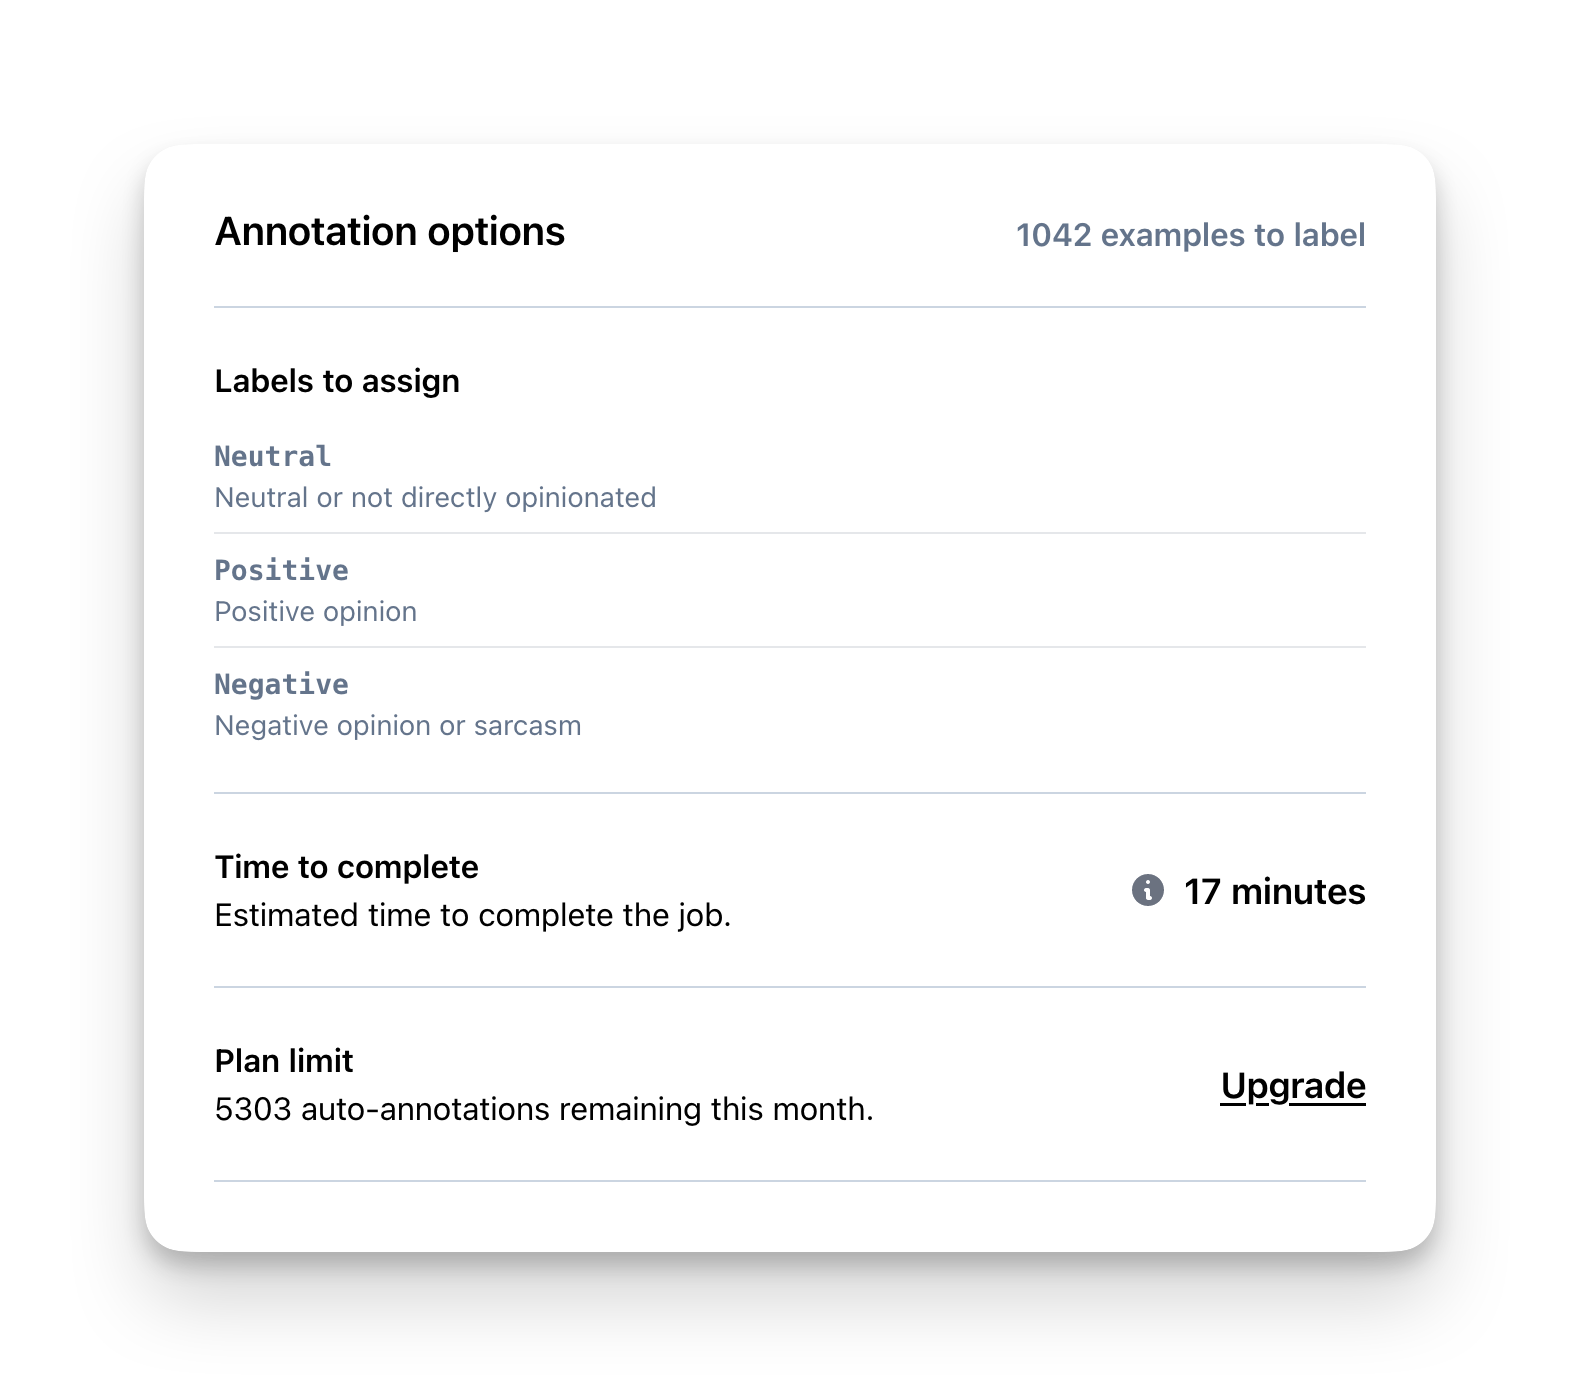
Manual annotation
Or semi-manual annotation provides you with an interface to manually label each example.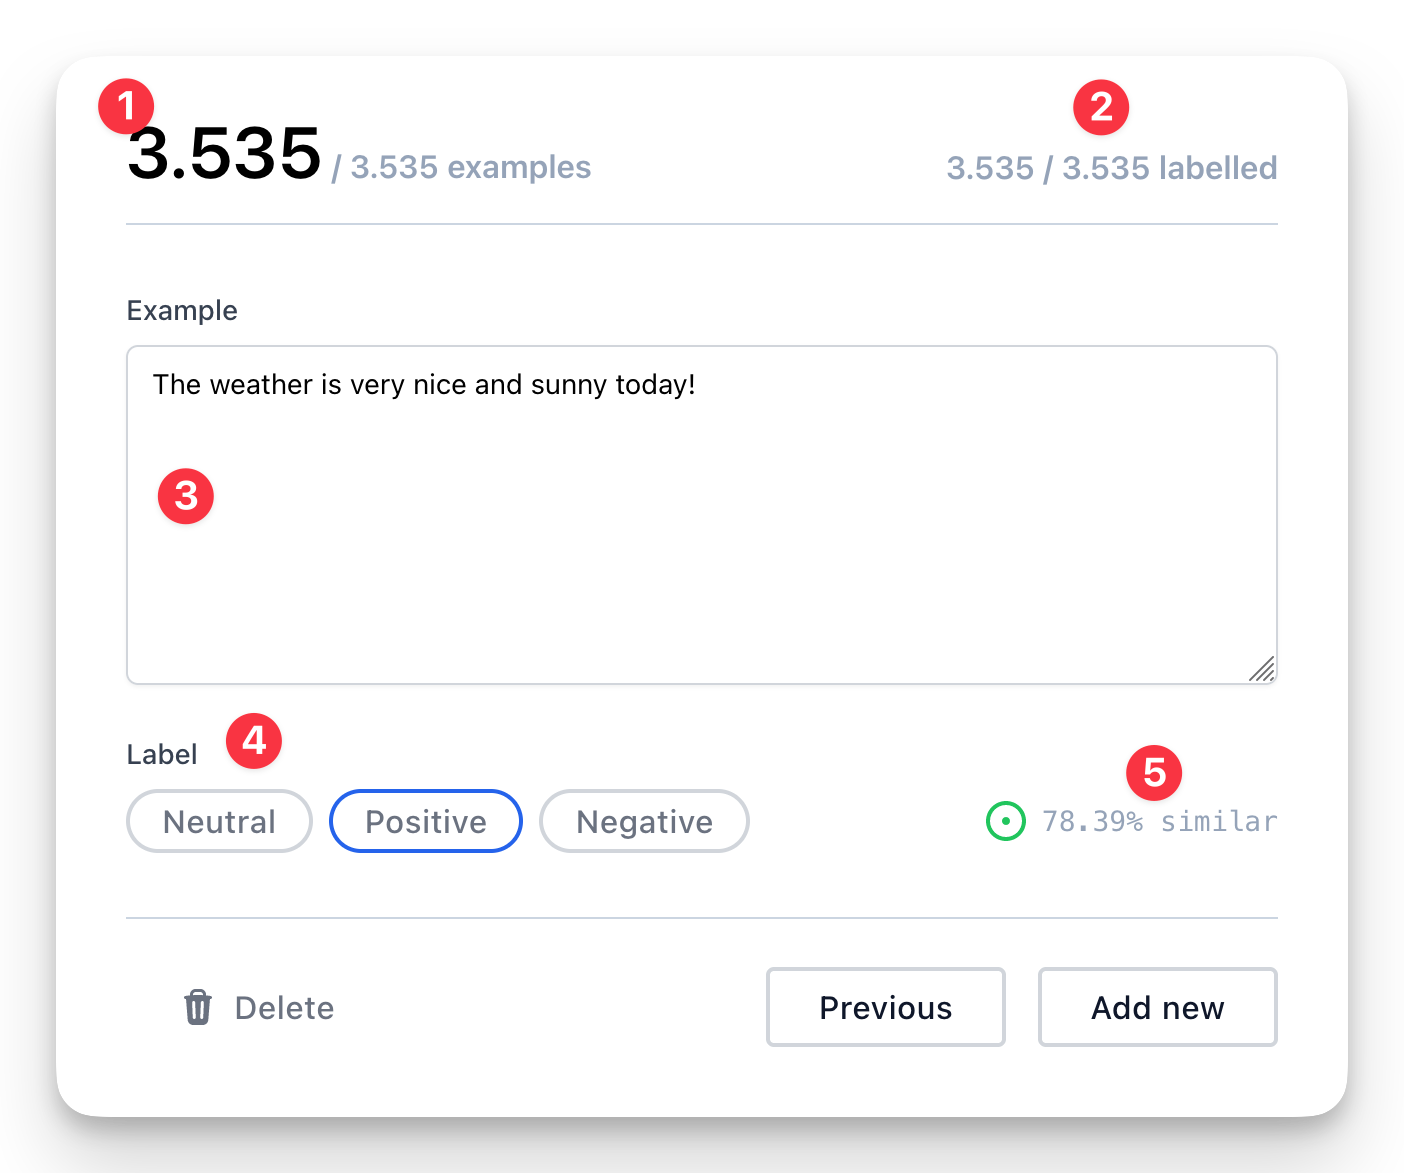
- The current example you are labeling is displayed at the top.
- Your progress is shown with the count of examples you have already labeled.
- The example text is provided, which can be altered to your preference.
- The appropriate label can be selected from this section. The tool will attempt to predict the correct label upon loading the example. 5. If the prediction is accurate, you can save and proceed to the next example.
- An estimated similarity score between the labels and example is viewable here. The tool will suggest the label with the highest similarity, although please note that this similarity score does not reflect the performance of your model.
5. Start the training
After annotating your data, proceed to the training process.Reviewing training data
Before beginning the training, review the model’s details, such as the total amount of training data, annotated examples, and the number of examples per label. This helps you identify any underrepresented labels and allows you to adjust them as needed. Aim for a balanced distribution of examples across all labels. Keep in mind that the quality and quantity of your training data significantly affect your model’s performance. You always have the option to add more data and retrain the model. If your data evolves over time, we recommend updating the model regularly. When retraining, the system replaces the old model with the newly trained one upon completion.Time to train
The training may take some time, depending on the amount of data and the complexity of your model. Throughout the training process, the system learns from your annotated examples and develops a model capable of classifying unseen text based on the labels you defined earlier. Once the training is complete, you will receive an email notification.6. Reviewing your model
Once your training is complete, you’ll want to integrate it into your project, but first, take a moment to review the performance.
F1-score
Start by checking the F1-score, a popular metric for gauging classification models. It combines precision and recall into one value for a balanced assessment of your model’s abilities. The F1-score ranges from 0 to 1, with 1 being the ideal balance between precision and recall. A perfect F1-score of 1 is uncommon for real-world problems. A 0.7 score can be great for certain problems. The minimum acceptable F1-score depends on the specific situation, so it can’t be universally defined. If your model has a relatively low F1-score, try adding more data to improve its performance. Focus on examples the model struggles with to better capture patterns. Alternatively, if more data isn’t possible, adjust the label probabilities threshold. For instance, if your threshold is at 0.5, consider raising it to 0.7 or higher. This will only assign a label if its predicted probability passes the new threshold, resulting in potentially better performance in real-world situations.Test run
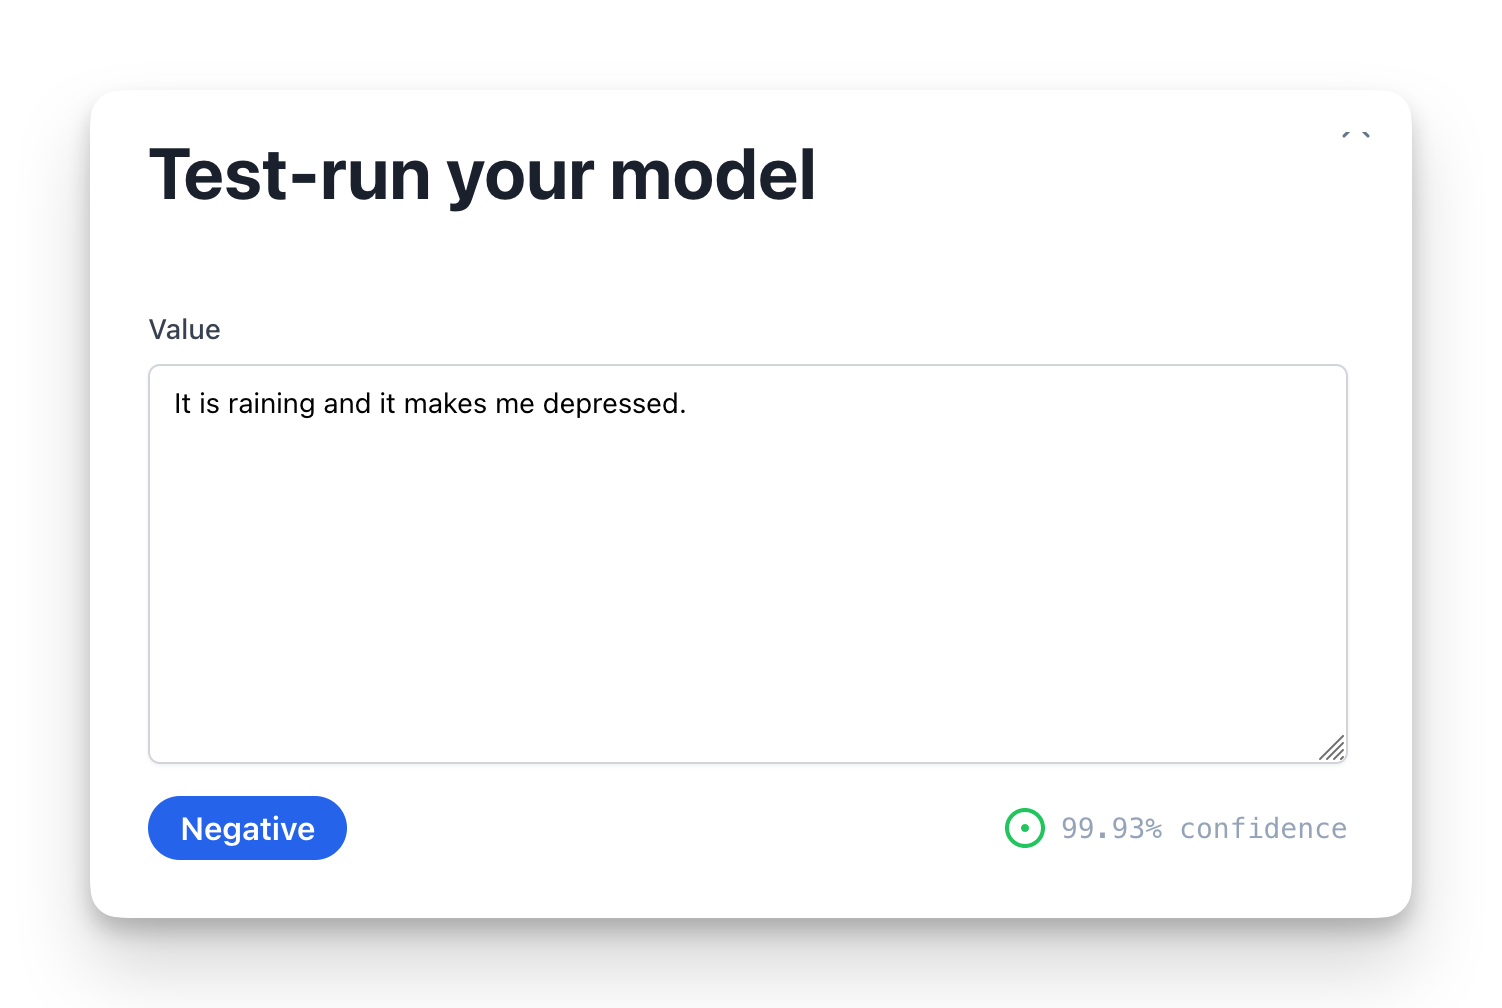
You can also test-run the model to quickly test various examples. This is useful if you want to make sure it handles certain scenarios before you implement it in your project.